I can't be there, but I thought that this was a wonderful occasion to quote the epic Tom,
"At any rate, the Goddess of Destruction dances on in Nevada, fang dribbling steak juice, the desert sun aglint on her necklace of skulls. In tantra, she is loved not one smooch less than her benevolent twin. Your pilgrim is slowly learning to love the Dark Dancer as well. Yes, but it was her flip side, the Good Witch, that enticed him to Nevada, where natural beauty struggles to hold its own against the treacherous ticky-tack spawned by the greed and fear of men. Surely, at the Canyon of Vaginas, the Mother of Creation would prevail."
-Tom Robbins, Wild Ducks Flying Backwards
Wednesday, August 29, 2007
Saturday, August 11, 2007
Superpowers
This American Life-Superpowers
"At the heart of this decision, the question I don't want to face is this, who do you want to be? The person you want to be, or the person you fear you really are? Don't rush into it. Think it over. Which would you choose?" -John Hodgeman (PC guy on Mac commercials)
"At the heart of this decision, the question I don't want to face is this, who do you want to be? The person you want to be, or the person you fear you really are? Don't rush into it. Think it over. Which would you choose?" -John Hodgeman (PC guy on Mac commercials)
Tuesday, August 07, 2007
Another One

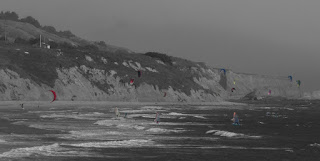
So I don't like this one as much as some others that I've done, but its got its own thing. Woulda been better to have zoomed way in on one kite surfer w/ the red kite, but oh well.
To answer Liz's question of how to do this, it's really easy. First take a color picture, and open it w/ the Gimp. Then you convert it to B&W under 'Image->Mode' and save that picture. So you now have two copies of the same exact pic, one in color and one in BW. Ok. Now, there's a few ways to do this, in order of complication: close Gimp completely, open the color pic, and then 'File->Open as Layer...' and then select the BW. Now you should have two layers w/ the color as the 'Background' and the BW as 'Layer1'. Second way, which makes more sense imo, you already have the BW picture open, go ahead and 'File->Open as Layer...' the color picture. Now go to 'Dialogs->Layers' now you can see what layers you have open. You should have the BW picture as background and the color as Layer1. Go ahead and click on the 'Background' (BW) and towards the bottom of the Layers widow you'll see a couple of arrows, this moves any layer in front or behind of the other layers. The ordering of the list of layers tells you what is in front/behind of ea. other. Also, the little picture of the eye to the left of ea. layer tells if it is visible or not, which can be clicked on and off so you can see what ea layer is doing to the over all piece. Another thing, is that when you click on a layer in the layer window, that activates it for editing, so be sure you have the right one selected.
So now you should have the two layers, w/ the color behind the BW pic. Now all you have to do is remove the parts of the BW pic you want to be color. This can be done in two ways, w/ the cutting tools (square, circle, and lasso (freehand)) or it can be done w/ the Eraser tool. I recommend the cutting tools for big stuff or regularly shaped stuff, and the Eraser for the edges and small stuff (has more flexibility w/ fade outs, different size erasers, different shape ones, etc.).
That's it. Have fun, there's alot you can do. If you want more info on the Gimp, just ask, I now know how to script w/ it, and do that cool three picture exposure blend w/ it (just need a pluggin for that btw).
Subscribe to:
Comments (Atom)


